
The Perfect Travel Project - Artichoke Market Bag
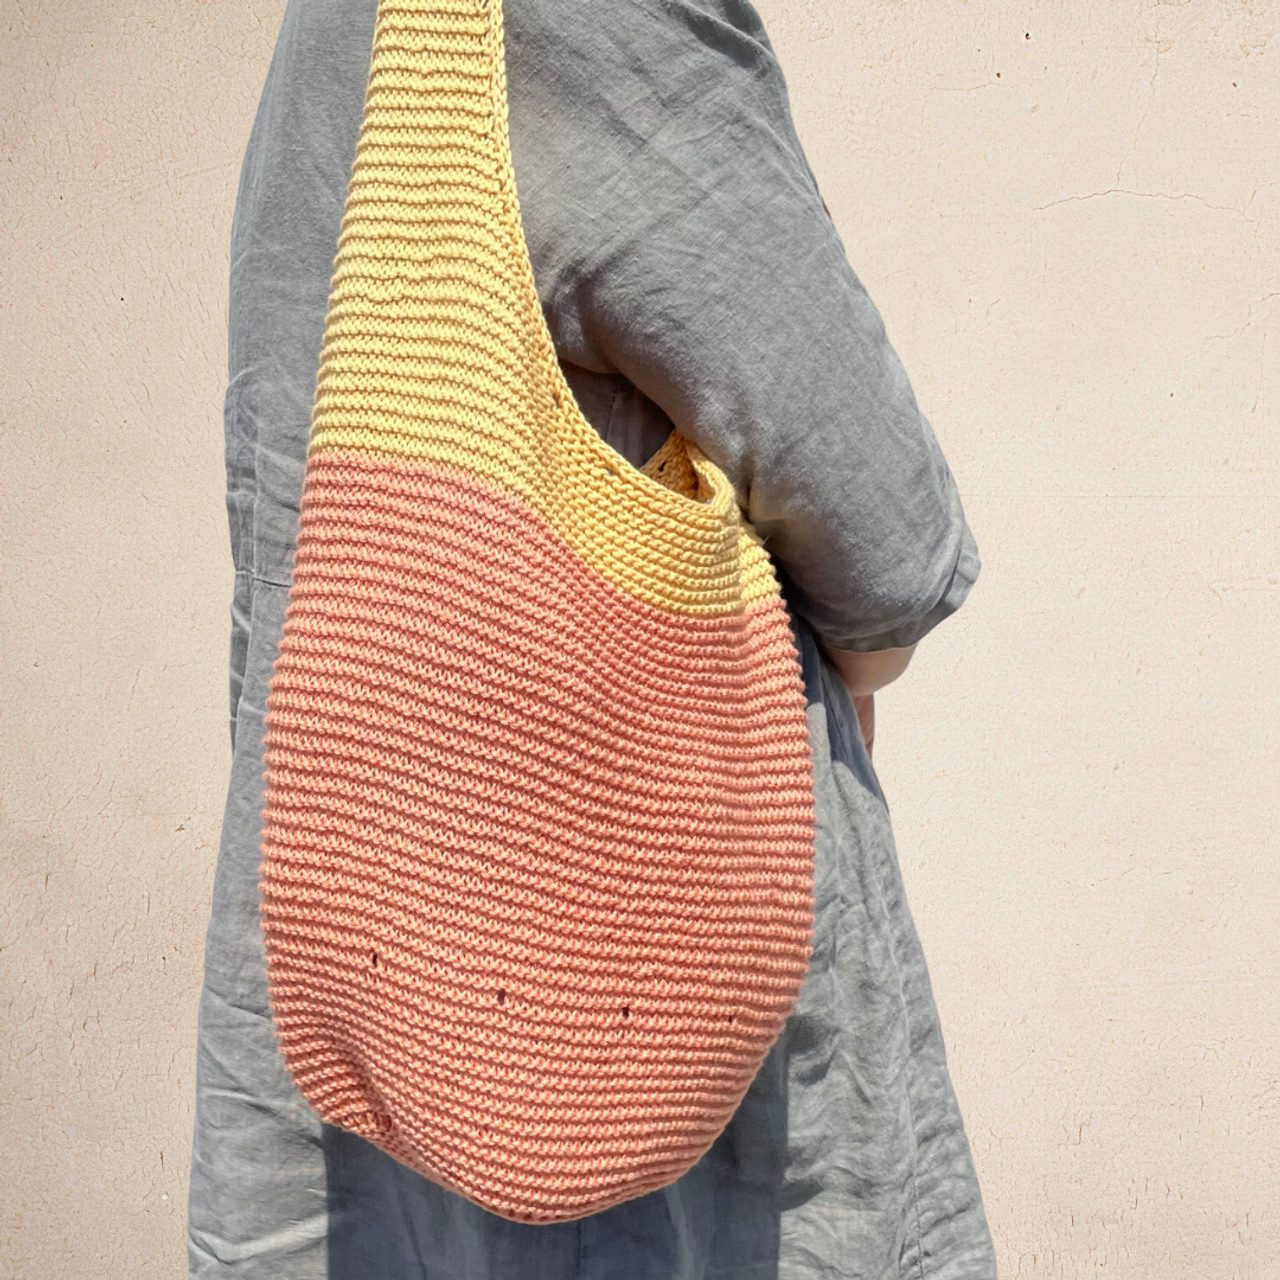
I’ve just come back from my first summer trip and can vouch for a great project-on-the-go: Artichoke by Pam Allen. In addition to being portable and easy to pick up and put down, this market tote is an item I know I’ll be using for the rest of the summer.
Artichoke is knit in the round and uses two colors. The yarn I selected for our kits is Sole, a sport-weight yarn from Pascuali Filati Naturali. Sole is 90% cotton making it strong and washable, and 10% cashmere making it easier and softer on your hands as you knit. Best of all, it is sold in 50g balls instead of 100g skeins which means you can start knitting without winding yarn first.
Here are 5 tips to consider when you make your Artichoke Bag.
1) The bag is knit in the round with the bottom knit first using double point needles. Once the piece gets large enough, it is transferred to a 24” circular needle. I made a point of knitting enough before I left so the bottom was ready to transfer to circulars, so I didn’t have to worry about fiddling with double points on the airplane.
2) The bag is knit using garter stitch. Don’t forget that to achieve garter stitch in the round you must alternate knit and purl rows. If you only knit in the round you will create a smooth stockinette stitch. The designer does not provide this reminder and it’s easy to forget!
3) The designer used the darker color on the bottom and the lighter color on the top. You can get an equally beautiful look if you reverse the colors. We’ve given you 2 balls of each color so you can decide the combination you love best! Use the extra yarn to make the bag longer, the straps longer or do what I did and knit the Hive Mind Washcloth as a gift or for yourself.
4) The design calls for a second set of circulars to knit on an edge around both sides of the strap. In addition to creating a more finished look, it will stabilize the strap and reduce stretching. Inspired by other knitters, I customized my bag by knitting an i-cord edge and boy do I love it! There are loads of tutorials on this method if you haven’t tried it before. I used a 4-stitch i-cord and the proportion is great. Remember to have the WRONG SIDE facing you when you knit your i-cord. That will ensure that the prettier side faces out. If you think you want to do an i-cord edge use 2 double points instead of a circular and make sure they are one size smaller than your main needle.
5) One of the things l really liked about the artichoke bag was how relaxed the garter looks. I was able to achieve that on my bag by steaming and aggressively blocking the bag. That means I PULLED the body of the bag from the sides and then from the top and bottom all around to lengthen the bag and open up the stitches. The cotton is strong and can handle it – and the effect is really nice.
Have fun with this project – and I dare you to make just one!!